
Thursday, November 29, 2012
Tuesday, November 27, 2012
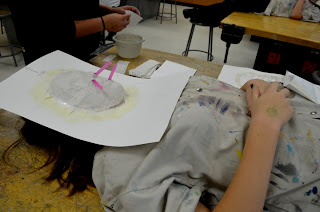
Plaster Mask-Making
The 7th and 8th grade World Art class is beginning their study of African Masks! It is fun to watch them take turns sitting for the masks to be formed on their faces. Nerves quickly settle as they see their classmates make it through the experience unscathed!
During my student teaching experience 7 years ago, my cooperating teacher taught me a method that I find far superior to smearing Vaseline all over our faces for the procedure:
1. Draw and cut out a face-shaped hole in a 12x18" piece of tag board. Make the first oval smaller than you think it needs to be, then trim small shavings off until it fits! Label the top/bottom so it fits the outline of your face correctly.
2. Tape Plastic wrap in a "bubble" over the hole. It needs to be loose enough that it does not stretch across your nose! Use small pieces of tape to seal the entire outline. You will need to bunch the plastic wrap in places.
3. Cut plaster tape into different sizes of strips and keep them safe and dry in an envelope.
4. When students are ready for the big event, they cover up with art smocks. The first student puts on the "face-guard," tape-side-up, then wiggles pieces of a drinking straw into each nostril and in the mouth, poking through the plastic wrap. The other students create the mask with 3 layers of plaster tape.

Monday, November 26, 2012
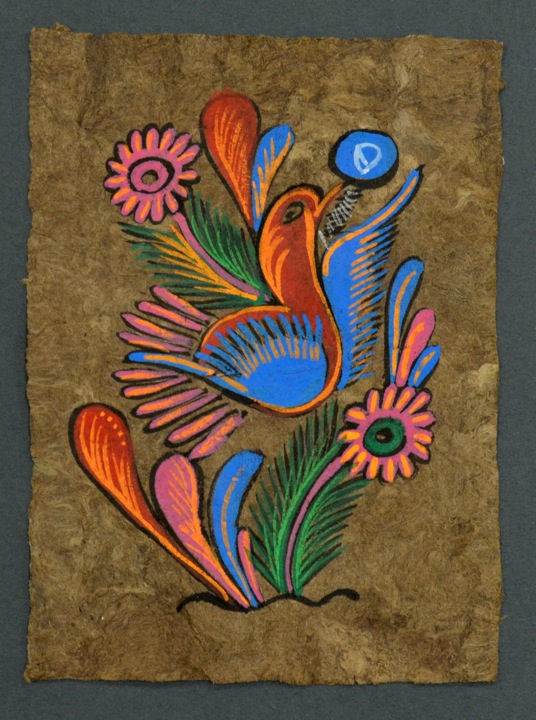
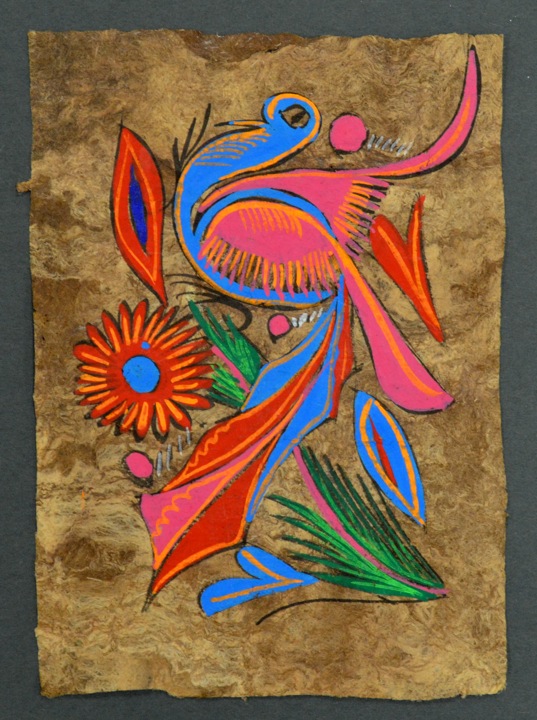
Middle School Amate Bark Painting
For years now, I've kept these colorful little paintings that I found while sorting through my late grandfather's house. I did not know what they were or where they are from, but I had a hunch that they were a travel souvenier... and I loved the brown handmade paper they are painted upon!


Finally, on the never-ending quest for middle school art lessons in my new teaching placement, BINGO! I found a lesson for "Amate Bark Paintings," and noticed that the resources looked suspiciously like the little paintings from Grandpa's house!
To prepare our "bark paper," we crumpled 6x9" pieces of grocery bags, smoothed them, and painted with watered-down India Ink using foam brushes. We ripped the edges to recreate the look of handmade paper-- all this after discussing the ACTUAL process of making bark paper, of course...
Viewing examples of Amate bark paintings, students were asked to identify commonalities between the works, and thus formed several main objectives for creation of a successful painting:
1. Stylized bird or animal as focal point (meaning the style is universal to the genre, i.e. how people in Egyptian art look very similar to each other in a simplified fashion)
2. Surrounded by branches, plants and flowers that use the principles of movement (to lead your eye around the composition) and rhythm (repeated elements such as flowers/leaves)
Students painted their designs with neon tempera paint (I had been looking for a way to use up those bottles!) and then outlined the completed shapes with permanent marker.


Friday, November 16, 2012
Pastel Wisconsin Farm Drawings
I often feel a twinge of nostalgia for my own rural Wisconsin childhood when 4th graders progress through their State History units each year! To celebrate the Dairy State culture, we viewed photographs of Wisconsin dairy farms and discussed our knowledge of the history and workings of these farms.


Chalk pastels are messy enough that we use double cleanup time during this project! However, the colors blend together beautifully.


Thursday, November 8, 2012
6th Grade Notan Collage
Notan: a Japanese word describing the visual interaction between dark and light positive and negative shapes.


6th graders create Notan collages to explore the concepts of positive space, negative space, and symmetry. The project is very challenging for many students at first, so we create practice collages on scrap paper. When they "pass" their practice compositions, they graduate to a 6" black square!
The rules:
-draw a shape hugging each edge of the square. The shape must begin AND end on the same edge.
-to make full use of positive/negative space, shapes should penetrate to the center of the square. Shallow shapes will not break up the space.
-once initial shapes are cut out, create smaller shapes within them if you can (and repeat this step).


Chairs for Charity-- The Rest of Them!
All nine art history-themed chairs are painted and delivered for Saturday's auction! Here are the final four:
 |
| Henri Rousseau |
 |
| Georgia O'Keefe |
 |
| Salvador Dali |
 |
| Andy Warhol Butterflies |
Monday, November 5, 2012
Chairs for Charity
If you enjoy art events and/or need a place to sit, read on!
On Saturday, November 10, the Rahr-West Art Museum is hosting the annual Chairs for Charity event. This is my first-ever year as a participant in the event, albeit vicariously through the skills and artistic vision of my 7th and 8th grade Art Gallery class. Here's how it works: local artists (that's us!) design and donate chairs for the event. After the auction, 50% of proceeds are presented as scholarships to local students in the visual and performing arts. Students are excited to have their artwork be part of such an important event at the Museum!
Here's what we started with-- behold the bounty of 4 thrift stores, 2 estate sales, and 4 garage sales! In one Saturday, nine secondhand chairs were acquired for a grand total of $19.
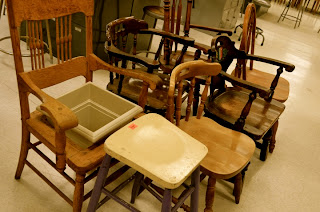
Students worked in groups of 2-3, chose an artist from a list I had prepared, then researched and reproduced the artist's style on the chair using acrylic paint.
Our nine groups are working hard and putting in extra time to complete these spectacular works of art! Here are the first five finishers:
 |
| Jackson Pollock |
 |
| Wassily Kandinsky: Color Study: Squares with Concentric Circles |
 |
| Vincent van Gogh |
 |
| Roy Lichtenstein |
 |
| Henri Matisse |
Thursday, November 1, 2012
Mandalas
There are some projects that stand out as a rite of passage in a K-12 Art curriculum... by this time, I have become pretty familiar with the elementary staples such as the 2nd grade pinch pot. Four of my seven years I traveled to the High School for part of the day, and my drawing students mastered the requisite cow skull still life. Now, in my first year as a junior high art teacher, I was SO EXCITED to teach mandalas for the first time!


We viewed examples in Eastern Art as well as the rose windows of Gothic cathedrals, discussing the technical aspects of radial balance. We explored the use of a circular format rather than the traditional rectangular painting. A mandala can be representative of cycles, as a circle has no beginning or end.
After reviewing design concepts, students began by sketching a rough idea of a mandala format, then carefully drew one "pie slice" on templates I had prepared (proof that geometry comes in handy for art teachers!!). Students were encouraged to make both a border and central shape. This template was traced forwards & backwards on a 12x12 sheet of watercolor paper. After some Sharpie work and watercolor painting, we have some fine-looking mandalas!
Many students embellished their work with custom motifs in different slices to create a theme... what creative kids!


Subscribe to:
Posts (Atom)