Pages

Tuesday, December 18, 2012

1st Grade Warm Suns & Cool Moons

Okay, these have been finished for a while already. As in... this may in fact have been one of the first projects we did this school year... but they finally made it into the bulletin board rotation about a month ago and I snapped some photos as I took the display down.

I thought that the first graders were especially expressive this year with the faces drawn on celestial bodies! After discussing the difference between warm and cold colors, students chose to portray either warm (sun) or cold (moon). We discussed facial expressions and different kinds of lines that could make our drawings interesting. Pencil drawings were traced in permanent marker then colored with crayon and resist-painted with tempera pucks. The product was well-worth a chuckle of endearment or two; more than one "cyclops moon" was spotted!


Monday, December 17, 2012

Tuesday, December 11, 2012

Patterned Personality Portraits

If I could tell you what led me to flip through that particular issue of 
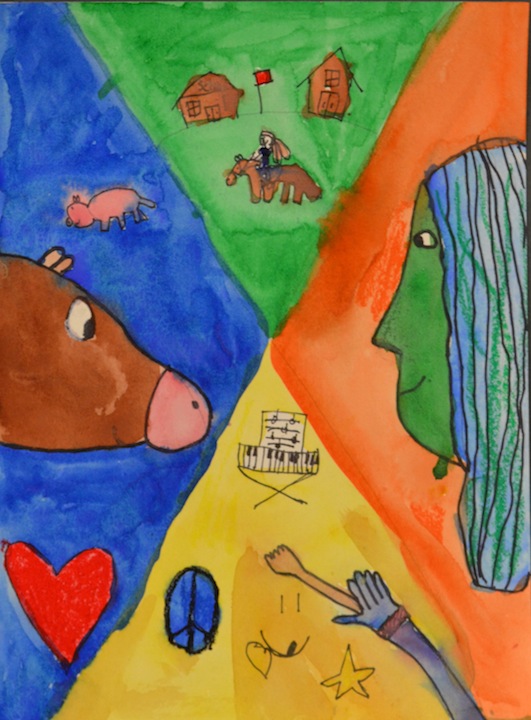
School Arts from November 2008, I would... but I'm glad I did because it has led to one of our most successful middle school projects so far this year! The high school studio lesson written by teacher Michelle Flandera Surrena of Ohio, of the same title as this posting, seemed suited to the dynamics of my second hour class of 7th and 8th grade students. I assumed correctly that the lesson would be adaptable to the younger age level. If you can find a copy of this issue, the article is well-written and more comprehensive than I will outline in this post!

Goals for my students included the following:
1. Observe facial proportions to draw accurate self portrait contours.
2. Create and utilize a color palette that will promote unity, contrast, and emotional use of color (check out the artist Friedensreich Hundertwasser... the colors!!).
3. Incorporate creatively written "character sketches" into your work to personalize the meaning and add texture.
4. Create and add patterns to open spaces with colored pencil (see the work of Gustav Klimt).

Art history resource for color: selected works of Friedensreich Hundertwasser
Art history resource for pattern: selected works of Gustav Klimt

The How-To (condensed version):
1. Create contour line drawing of face on 16"x20" Bristol board or tag board. Outline with sharpie.
2. Use glue-water (equal parts Elmers to H2O) to decoupage cut or torn pieces of tissue paper to the surface.
3. Re-trace contours with Sharpie, and then use the marker to "fracture the space"-- some outlined by color, some followed natural facial lines.
4. Outline created shapes & spaces with handwritten text fragments.
5. Use colored pencil & fine point pen to create patterns within shapes.

The students worked on these for a very long time, and I was impressed and proud to see them become so engrossed by their work. Adding the text, in my opinion, made an enormous difference. Students were excited to write about what makes them unique... song lyrics, favorite jokes, and memories came pouring out. From a viewer's standpoint, I find that the words add textural interest to the work as well as emotional depth. Although I would never expect a viewer to read all the words on a single portrait, the little phrases captured even in the quickest of views provide a snapshot of the artist's vision and personality.

The first finisher-- I forgot my camera today!


Wednesday, December 5, 2012

3rd Grade-- I and the Village

In 3rd grade Art, we pretend to travel around the world to "visit" different artists in their home countries, filling out our "passports" as we go.

Our latest imaginary journey took us to a small village in Russia to visit the childhood home of Marc Chagall. We looked at a number of his fantastic paintings, focusing on I and the Village.


Tuesday, December 4, 2012

2nd Grade Stamping

2nd graders just finished these beautiful textural stamping projects. The lesson itself serves as an introduction to terms and concepts key to upcoming projects:
1. The underlayer of tissue paper leads into our study of vertical and horizontal lines.
2. the stamped overlayer introduces us to our upcoming printmaking unit. Students practice getting the right amount of ink on stamps, registering the location, and lifting the print without smudging.

Materials:
-sturdy paper or tag board base
-tissue paper of many colors, cut into strips 1" wide. I cut a mixture of 9" and 12" strips to fit the base paper.
-cups of glue/water mixture
-paint brushes
-stamps: I had my 6th grade students use linoleum carving tools on the ends of erasers to create a classroom set of stamps.
-flat trays of liquid tempera paint or ink

Day One:

Students use glue-water mixture to brush down strips of tissue paper in vertical and horizontal stripes.


Day Two:
Students stamp black tempera paint to their plaid underlayer, aiming for the squares where the vertical and horizontal lines intersect.


Thursday, November 29, 2012

Clay Day

One of life's little pleasures: cutting a new block of clay like a giant brick of cheese!


Tuesday, November 27, 2012

Plaster Mask-Making

The 7th and 8th grade World Art class is beginning their study of African Masks! It is fun to watch them take turns sitting for the masks to be formed on their faces. Nerves quickly settle as they see their classmates make it through the experience unscathed!

During my student teaching experience 7 years ago, my cooperating teacher taught me a method that I find far superior to smearing Vaseline all over our faces for the procedure:

1. Draw and cut out a face-shaped hole in a 12x18" piece of tag board. Make the first oval smaller than you think it needs to be, then trim small shavings off until it fits! Label the top/bottom so it fits the outline of your face correctly.

2. Tape Plastic wrap in a "bubble" over the hole. It needs to be loose enough that it does not stretch across your nose! Use small pieces of tape to seal the entire outline. You will need to bunch the plastic wrap in places.

3. Cut plaster tape into different sizes of strips and keep them safe and dry in an envelope.

4. When students are ready for the big event, they cover up with art smocks. The first student puts on the "face-guard," tape-side-up, then wiggles pieces of a drinking straw into each nostril and in the mouth, poking through the plastic wrap. The other students create the mask with 3 layers of plaster tape.


Monday, November 26, 2012

Middle School Amate Bark Painting

For years now, I've kept these colorful little paintings that I found while sorting through my late grandfather's house. I did not know what they were or where they are from, but I had a hunch that they were a travel souvenier... and I loved the brown handmade paper they are painted upon!


Finally, on the never-ending quest for middle school art lessons in my new teaching placement, BINGO! I found a lesson for "Amate Bark Paintings," and noticed that the resources looked suspiciously like the little paintings from Grandpa's house!

To prepare our "bark paper," we crumpled 6x9" pieces of grocery bags, smoothed them, and painted with watered-down India Ink using foam brushes. We ripped the edges to recreate the look of handmade paper-- all this after discussing the ACTUAL process of making bark paper, of course...

Viewing examples of Amate bark paintings, students were asked to identify commonalities between the works, and thus formed several main objectives for creation of a successful painting:

1. Stylized bird or animal as focal point (meaning the style is universal to the genre, i.e. how people in Egyptian art look very similar to each other in a simplified fashion)

2. Surrounded by branches, plants and flowers that use the principles of movement (to lead your eye around the composition) and rhythm (repeated elements such as flowers/leaves)

Students painted their designs with neon tempera paint (I had been looking for a way to use up those bottles!) and then outlined the completed shapes with permanent marker.


Friday, November 16, 2012

Pastel Wisconsin Farm Drawings

I often feel a twinge of nostalgia for my own rural Wisconsin childhood when 4th graders progress through their State History units each year! To celebrate the Dairy State culture, we viewed photographs of Wisconsin dairy farms and discussed our knowledge of the history and workings of these farms.

Chalk pastels are messy enough that we use double cleanup time during this project! However, the colors blend together beautifully.


Thursday, November 8, 2012

6th Grade Notan Collage

Notan: a Japanese word describing the visual interaction between dark and light positive and negative shapes.

6th graders create Notan collages to explore the concepts of positive space, negative space, and symmetry. The project is very challenging for many students at first, so we create practice collages on scrap paper. When they "pass" their practice compositions, they graduate to a 6" black square!

The rules:
-draw a shape hugging each edge of the square. The shape must begin AND end on the same edge.
-to make full use of positive/negative space, shapes should penetrate to the center of the square. Shallow shapes will not break up the space.
-once initial shapes are cut out, create smaller shapes within them if you can (and repeat this step).


Chairs for Charity-- The Rest of Them!

All nine art history-themed chairs are painted and delivered for Saturday's auction! Here are the final four:

Henri Rousseau

Georgia O'Keefe

Salvador Dali

Andy Warhol Butterflies

Monday, November 5, 2012

Chairs for Charity

If you enjoy art events and/or need a place to sit, read on!

On Saturday, November 10, the Rahr-West Art Museum is hosting the annual Chairs for Charity event. This is my first-ever year as a participant in the event, albeit vicariously through the skills and artistic vision of my 7th and 8th grade Art Gallery class. Here's how it works: local artists (that's us!) design and donate chairs for the event. After the auction, 50% of proceeds are presented as scholarships to local students in the visual and performing arts. Students are excited to have their artwork be part of such an important event at the Museum!

Here's what we started with-- behold the bounty of 4 thrift stores, 2 estate sales, and 4 garage sales! In one Saturday, nine secondhand chairs were acquired for a grand total of $19.


Students worked in groups of 2-3, chose an artist from a list I had prepared, then researched and reproduced the artist's style on the chair using acrylic paint.

Our nine groups are working hard and putting in extra time to complete these spectacular works of art! Here are the first five finishers:


Jackson Pollock
Wassily Kandinsky: Color Study: Squares with Concentric Circles

Vincent van Gogh

Roy Lichtenstein

Henri Matisse

Thursday, November 1, 2012

Mandalas

There are some projects that stand out as a rite of passage in a K-12 Art curriculum... by this time, I have become pretty familiar with the elementary staples such as the 2nd grade pinch pot. Four of my seven years I traveled to the High School for part of the day, and my drawing students mastered the requisite cow skull still life. Now, in my first year as a junior high art teacher, I was SO EXCITED to teach mandalas for the first time!

We viewed examples in Eastern Art as well as the rose windows of Gothic cathedrals, discussing the technical aspects of radial balance. We explored the use of a circular format rather than the traditional rectangular painting. A mandala can be representative of cycles, as a circle has no beginning or end.

After reviewing design concepts, students began by sketching a rough idea of a mandala format, then carefully drew one "pie slice" on templates I had prepared (proof that geometry comes in handy for art teachers!!). Students were encouraged to make both a border and central shape. This template was traced forwards & backwards on a 12x12 sheet of watercolor paper. After some Sharpie work and watercolor painting, we have some fine-looking mandalas! 

Many students embellished their work with custom motifs in different slices to create a theme... what creative kids!