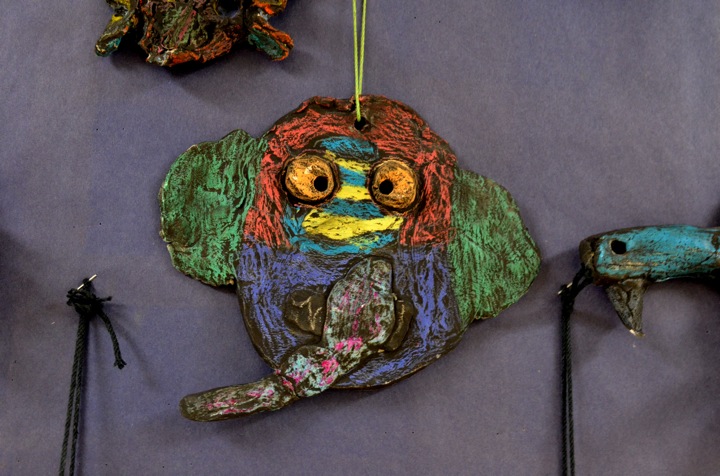
Day One: we viewed PowerPoint slides of masks from around the world: the Pacific Northwest, Africa, Japan, India, and South America. We discussed differences and similarities between masks. A mask can really take any shape. It can look like a human, an animal, or an imaginary creature. It can be symmetrical, or asymmetrical. Most masks had eyes, nose, and a mouth, but they could form different expressions. After viewing masks, we drew as many mask ideas as we could fit on a sheet of paper.
Day Two: CLAY DAY! We passed out our sketches from Day 1 and got to work on the clay.
1. Roll the clay to 1/2 " slab
2. Cut out the outside shape of your mask
3. Use your extra clay to add facial features and designs.
4. When the students are complete, the teacher can poke a small hole in the top-center of the mask so it can be displayed on a wall.
Day Three: When all the masks had been bisque fired, we colored them using a resist process.
1. Color the bisque ware as brightly as you can with crayons. This was a PERFECT occasion for me to bring out the coveted bins of glitter crayons! The crayons are too blunt to color many of the small areas, but this turns out to your advantage in step 2.
2. Use black ink/paint to paint over the top of your crayon layer. We used black tempera blocks (the ones that look like hockey pucks) because they are so washable. I hear that India Ink also works; I can assume black watercolor would work. Paint the top and sides, filling in all the crevices so no white shows.
3. Run the mask under water to wash away the excess paint and expose the crayon. In one of my classrooms, we have only one sink, so I set buckets & sponges around the room at a few "washing stations."
Note: if you have the time & resources, I think it would look sharp to varnish the completed projects with Mod Podge, acrylic gloss medium, or spray varnish. We did not do this step, but I would think about it next time.


No comments:
Post a Comment